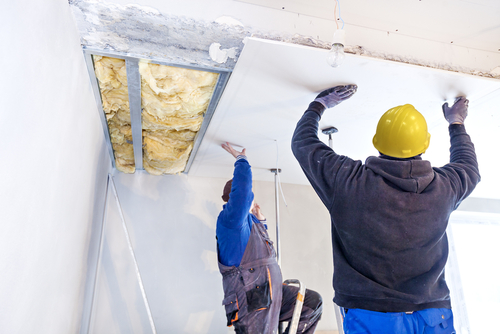
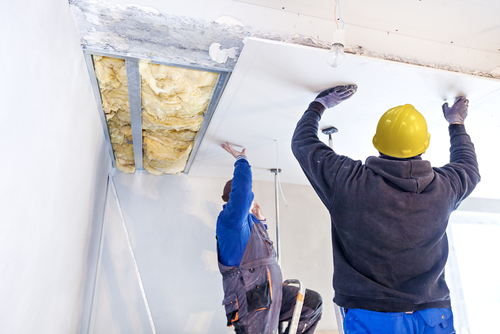
Installing drywall in your home is a skill that you will find invaluable if you do any building of your own. Drywall is a relatively inexpensive and popular way to finish off your interior spaces, concealing the framing and insulation behind. While the installation is quick and easy, drywall also requires a certain amount of effort and access to the correct tools to be done properly. With the proper equipment, you can do the job yourself fairly easily, or you can secure the help of a professional if you so desire. It’s always a good idea to get help from a second person; certain sheets of drywall are heavy and require support on both ends.

What tools do I need?
Before you start the project, take an inventory of the tools you will need. If you find you are missing any, head to a local building supply store and acquire them before starting the project. A measuring tape is the first thing; you’ll also need a drywall knife, a paper tape, a drywall saw, and a mud pan. A cordless drill will also make the process much easier. Make sure you have a spare battery on the charger if you’re going to be completing a big job. You may want to lay something down on the floor as well as the job can potentially be a bit messy. You will also want to get a respirator for making any cuts since drywall can be very dusty. Make sure you get a respirator labeled with “N95”, which indicates it is at least 95% efficient and will make sure you’re safe. Also, make sure you wear old clothes since the dust and drywall mud can be messy.
What other materials do I need?
Of course, you’ll need to have drywall panels. For the installation, you’ll need joint tape, joint compound, and a lot of drywall screws. Make sure the drywall screws are not too long; it’s certainly possible to damage the interior of the walls with improperly applied screws. Do a thorough inspection of the area you are installing the drywall to ensure there aren’t any pipes you might puncture or other vulnerable spots. Once you have taken a thorough inventory, you are ready to begin the project.
Measuring the room
Before you can install anything, or really even begin your inventory, you need to do a complete measurement of the space you’ll be installing your drywall in. Measure the area, starting with the ceiling, to calculate the exact amount of material you will need. Use this construction calculator to determine exactly how much material you will require to get the job done. You simply enter the dimensions of your room and it will project for you how much material you need to purchase. It will also factor in the doors and windows in your home, taking the guesswork out of the project and ensuring you aren’t left with an abundance of unnecessary materials.
Start with the ceiling
The ceiling is the first part of the installation that you will want to undertake. You’ll want to start in a corner with one panel. Assuming you have a relatively large ceiling and won’t be able to cover the length of it with a single drywall panel, you will have to make sure the ends of the panels land on the joists you will also install. Line up the drywall panel with the joists or strapping. With the help of another person, line up the first drywall panel and very carefully screw it into place. You’ll want to use about five drywall screws across the width of each drywall panel. Make sure each screw is about 1/2 inch away from the edges of the panels. Drive the screws directly into the joists or strapping, making sure you don’t push the screw heads in too deeply. If they break through the surface of the paper covering, you will have damaged your drywall. You’ll repeat this process with all of the panels that you are installing on your ceiling.
You might have fixtures in your ceiling that you have to work around; if this is the case, measure the particular panel that will be going over the fixture and carefully mark the exact spot you will need to cut. Once you have placed the panel, you can use a rotary cut-out tool to cut the spot where the fixture will be placed. It’s essential to make sure you get the measurements correct on this one, or your cutting may be off-center.
Next, cover the wall
The next step will be to cover the wall. Just as with the ceiling, measure the area thoroughly first and make sure that the ends of the panels fall along the center of the studs in your wall. As with before, use five screws along each edge to drive it into place. If you have any openings for doors or windows, don’t worry if the panel hangs over it at this time. You can always trim it to your specifications later. As you did with the ceiling, make sure you accurately measure the area before making any cuts. Before doing any cutting, mark the area that you have to trim with a pencil. Also as before, you will have to take care not to drive the screws in too deeply. If you notice anywhere that you have accidentally driven a screw through the paper face, you can add a second screw next to it to ensure the drywall is still supported.
Finishing up
After you’ve installed everything, sweep up, and your drywall will soon be ready for finishing! Drywall provides a blank canvas. Once you’ve finished this process, you can make any final touches to your wall. You can lay wallpaper over it or paint it to get your home looking exactly how you want. You can texturize the walls if you’re looking for a more dynamic finished product. Although you might not think of it, painting a textured wall is a lot easier than painting a flat wall as the texture helps hide imperfections, so unless you are an adept painter or you are hiring a professional, texturing may be a better way to go if you want to paint.
Further information
Drywall can be one of the simplest DIY construction projects, especially if you are working with a small space and just blank walls. However, if at anytime you are unsure or no longer want to execute the project, speak with the professionals at your local building material supply store. They will be able to either direct you to great resources or take on the job themselves. Never hesitate to ask questions or stop when things become too challenging. You will save time and money by consulting an expert or handing over the reins completely.


